KB 118007 - NVIDIA Field Diagnostics Test (FDIAG) Tool for Validating H100/H200
FDIAG
NVIDIA’s Field Diagnostics Test
Tool (FDIAG)is an offline hardware test tool for GPU health test. Mainly used
in RMA workflow and tool is not provided to public for download. They are
distributed through OEMs or directly from NVIDIA support as part of service. It
covers log generation, FDIAG execution, and log collection for RMA or system
verification.
Prerequisites
- Portable bootable USB (Service OS)
- USB hub
- USB data stick for log collection
- Keyboard and monitor (can be removed after FDIAG starts)
Step 1: Boot into Service OS
- Connect the following:
Bootable Ubuntu USB stick
USB hub
USB data stick for Collecting Log - Power on or restart the system.
- Press F11 to access the Boot Menu.
- Select the portable USB stick and boot into Service OS (Ubuntu). If USB Stick is not visible, go to BIOS and change the boot settings UEFI to dual mode. After Complete the test change back to UEFI mode.
- Log in using the following credentials:
Username: service
Password: 1234
Step 2: Initial GPU & System Verification
Perform the
following checks before starting FDIAG.
1. Verify
GPU Detection
nvidia-smi
2. Create
GPU Serial Number List
nvidia-smi
-q | grep -i serial >> nvidiaserials.txt
3. View GPU
Serial Numbers
vi
nvidiaserials.txt
4. Verify
GPU VBIOS Firmware
nvidia-smi
-q | grep -i Vbios
5. Verify
BIOS and BMC Versions
sudo
./IPMICFG-Linux.x86_64 -summary
Step 3: Running NVIDIA Field Diagnostics (FDIAG)
- Change directory to the H100 folder:
Type - cd
H100 to change into H100 folder. You can run ls to confirm that the Python
script is available.
- Start FDIAG:
Type - python3
run.py
- Select the system type:
Option 1 – Intel system
Option 2 – AMD system
- Select the test mode:
Option 4 – RMA
Option 5 – System Validation
- Wait until the DGX FIELD DIAGNOSTIC messages appear
- Once FDIAG has started we can safely remove Keyboard and monitor
Important
Notes
- H100 / H200 FDIAG runtime: Approximately 75–90 minutes
- A100 FDIAG runtime: Approximately 5 hours
- Always start the sequence as:
For Intel Systems start 1 to 4/.5
For AMD Systems start 2 to 4/5
Once FDIAG
begins, you cannot return to generate logs. PASS or FAIL Screen will appear once
test finished.
FAIL Screen Image is Attached
Step 4: Log Collection After FDIAG Completion
1. Verify
All Drives
Type - lsblk
Type - lsblk
2. Identify
Data USB
Typically identified as sdb/sdd
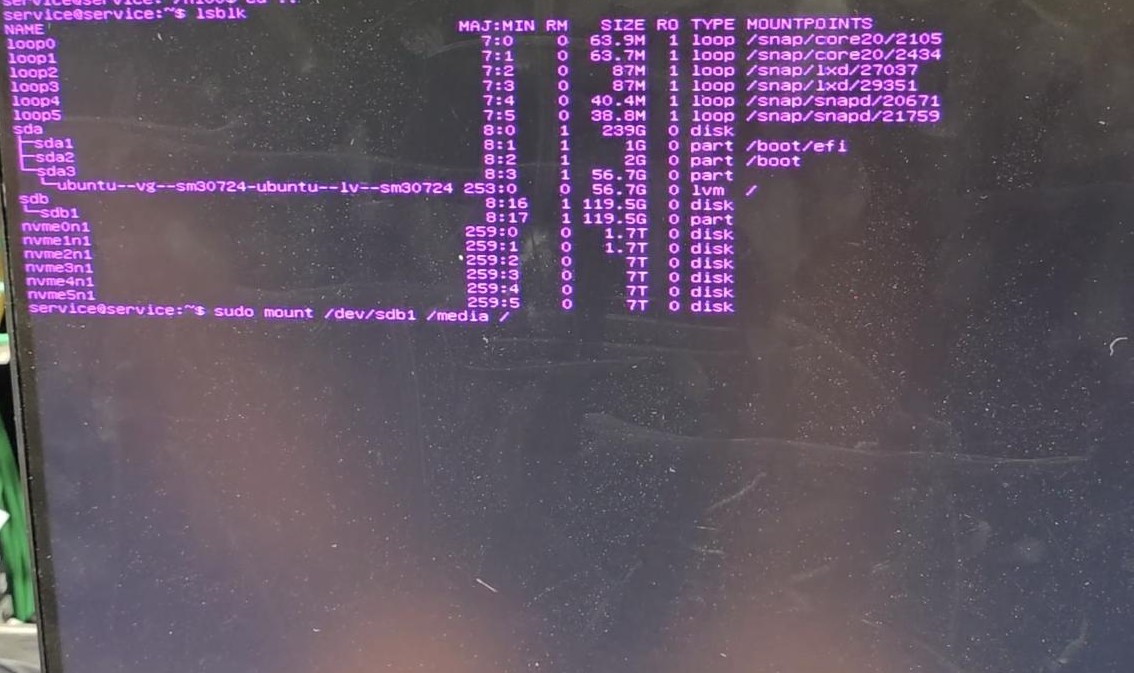
Typically identified as sdb/sdd
3. Mount the
USB Partition
Type -sudo mount /dev/sdb1 /media/usb/
Type -sudo mount /dev/sdb1 /media/usb/
4. Copy or
Move Logs
Copy or move
the System Serial Number folder to the USB:
Type - sudo cp -r
<System_Serial_Number_Folder> /media/usb OR Type - sudo mv <System_Serial_Number_Folder>
/media/usb
5.
Synchronize Data
Type - sync
6. Verify
USB Contents
Type - cd
/media/usb
ls (or) dir -i
Step 5: USB Removal and Upload
- Unmount the USB safely:
Type - sudo umount /media/usb/
- Remove the USB data stick.
- Connect it to your laptop.
- Upload the collected folder to the shared drive / Box folder.
- Shut down Ubuntu OS and remove all USB devices.