KB 574001 - How to spin up private EKS Cluster on AWS?
EKS Cluster : Amazon Elastic Kubernetes Service (Amazon EKS) is a managed service that eliminates the need to install, operate, and maintain your own Kubernetes control plane on Amazon Web Services (AWS).
Let’s begin the process⚙️ of creating the EKS cluster:
- Step 1 : Log in to your AWS account.
- Step 1.1 : In the search bar, type “EKS” and press Enter.
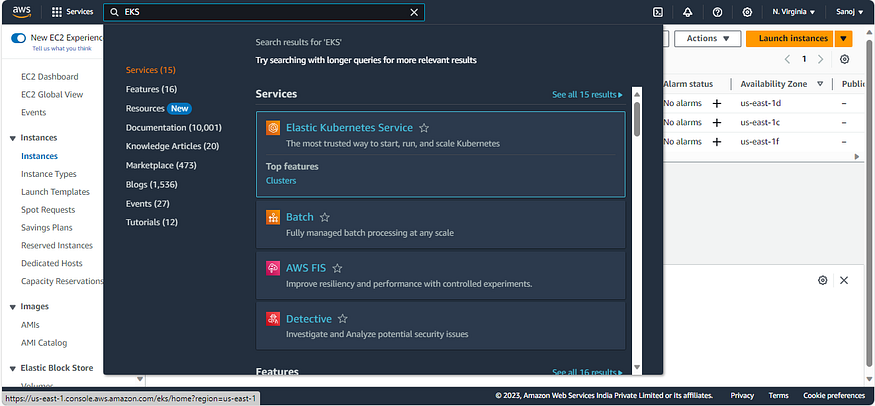
The following screen will appear.
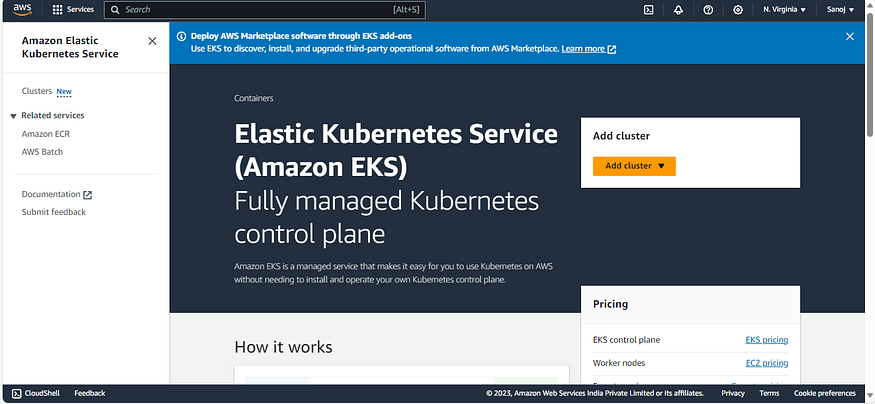
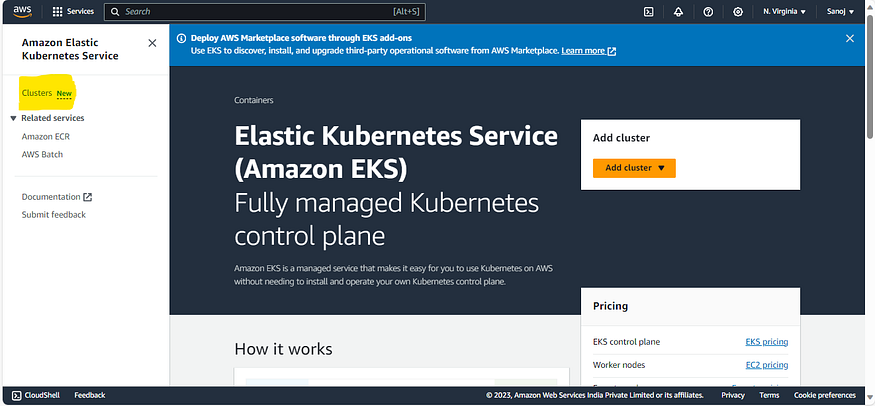
Step 2: Now Click on “Clusters”
After click on the “Clusters” following screen will appear.
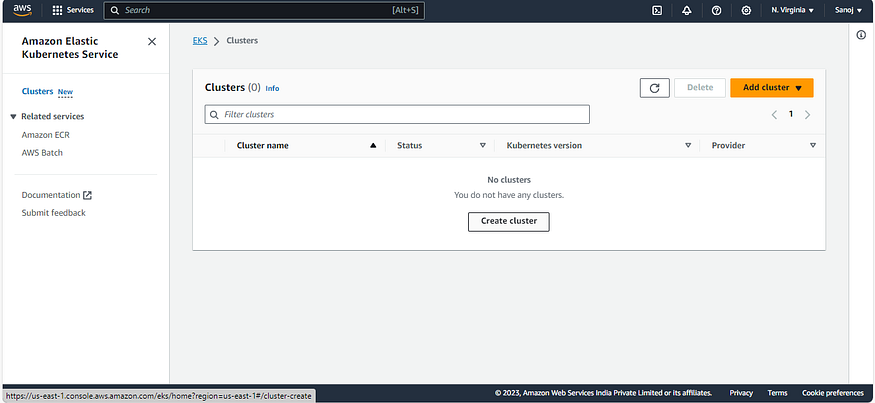
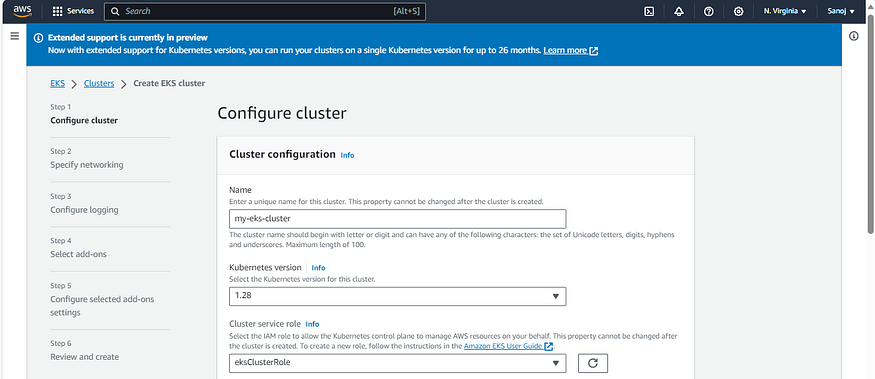
Step 3 : Click the ‘Create cluster’ button. After clicking, you’ll see the following screen.
Simply fill in the details according to your requirements. As an example, I’ve provided the cluster name as ‘my-eks-cluster’ and click on ‘Next’
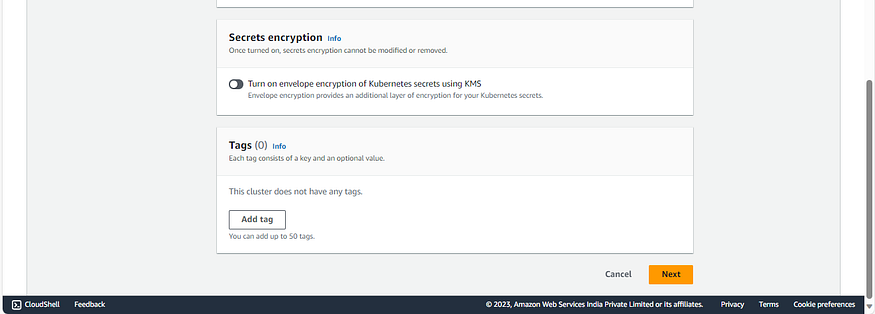
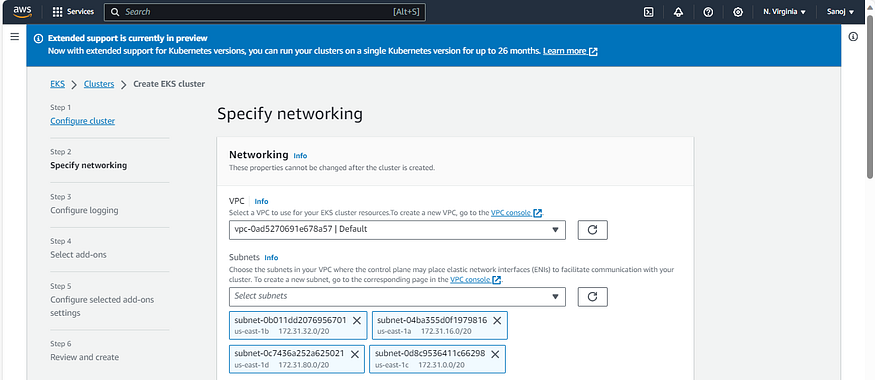
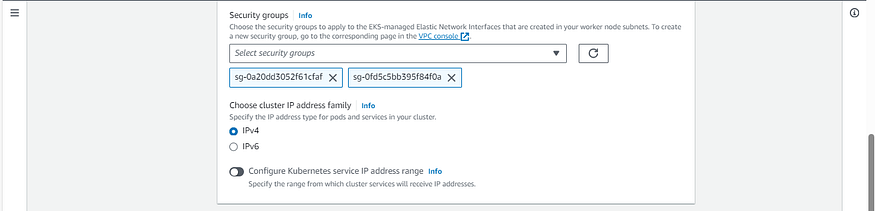
Step 4 : After clicking the ‘Next’ button, the following screen will appear. Here, you need to select your required options such as VPC, Subnets, cluster IP address family, and cluster endpoint access according to your needs and click on ‘Next” button.
For reference, you can take a look at the screenshot image below.”
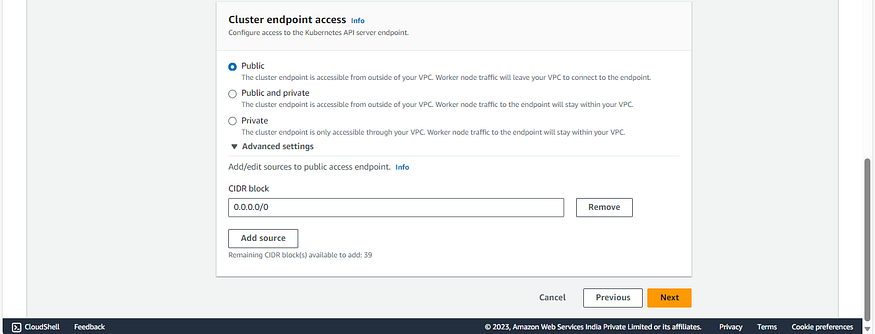
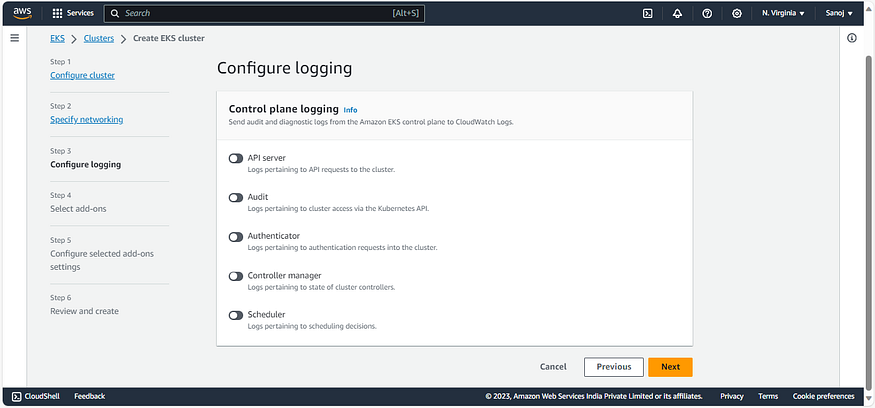
Step 5: After clicking the ‘Next’ button, the following screen will appear. Here, you have the option to either ignore or set up login options.
Since I currently don’t have any specific requirements, I’m skipping this step and clicking on the ‘Next’ button. For reference, you can take a look at the screenshot image below.
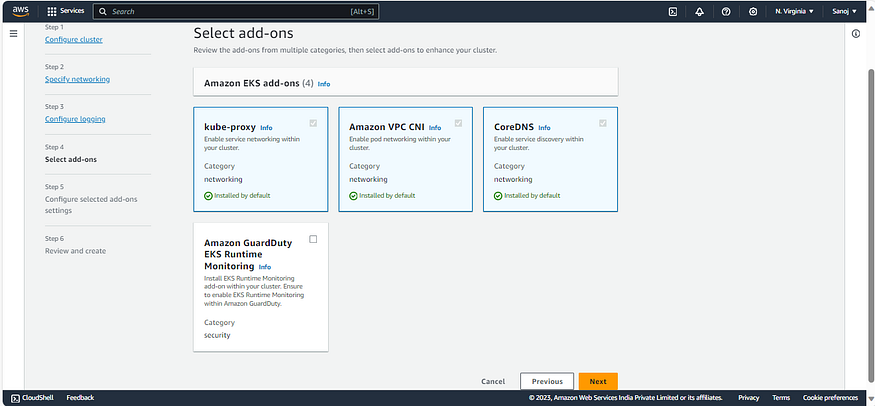
Click ‘Next’ If you have requirements for runtime monitoring, you can check the box and select ‘Amazon GuardDuty’ Alternatively, you can choose to ignore this option — it’s up to you.
Step 6: After click “next” following screen will appear for “Configure selected add-ons settings” choose according to your requiremnt as of now i am setting defaults everything.
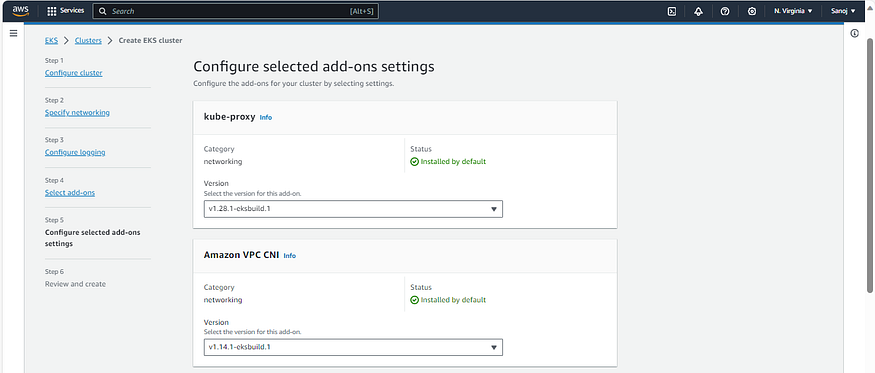
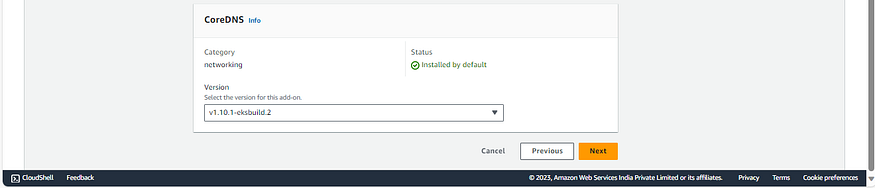
Step 7: Now, simply click ‘Next’ and the following screen will appear for review. Check to ensure everything is correct.
If any changes are needed, you can modify them here after selecting the desired options. For now, I’m proceeding by clicking ‘Create’.
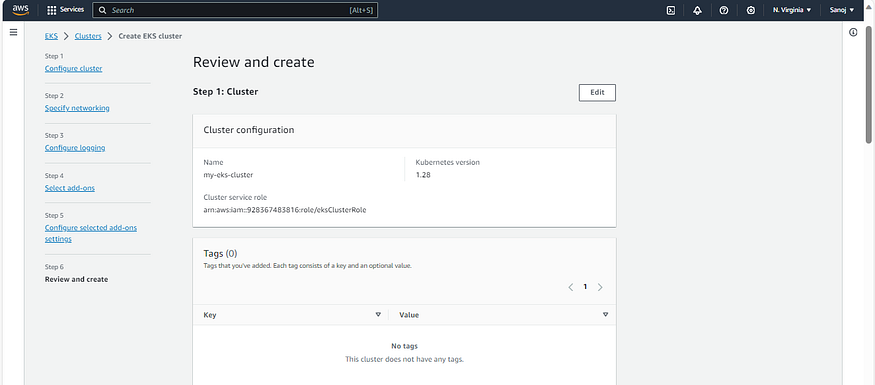
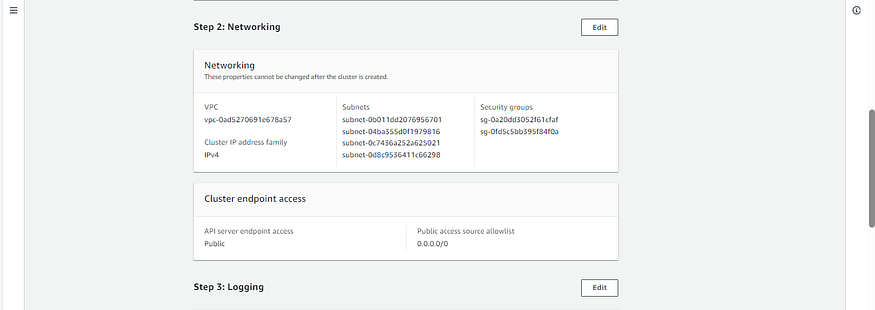
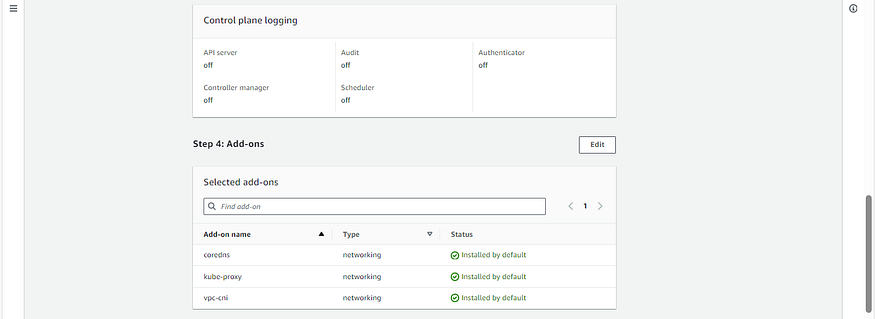
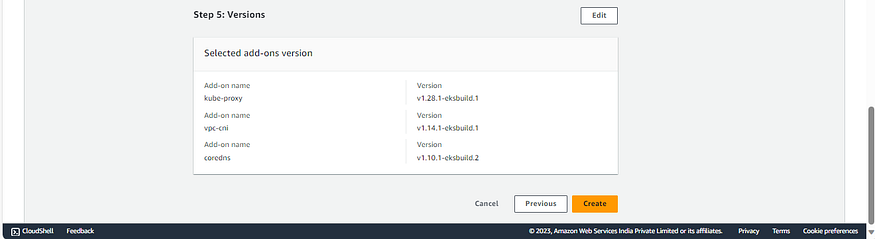
Step 8: After clicking the ‘Create’ button, you’ll see the following screen, and it will take approximately 10 to 20 minutes to create the cluster.
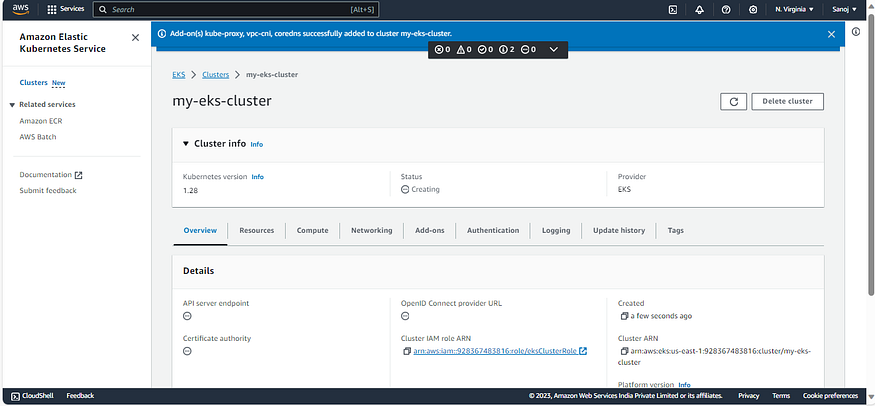
Now, the second phase involves creating a node group. Please note that you cannot create the node group before creating the cluster.
Step 9: After your cluster is ready, simply click on the ‘Compute’ tab.
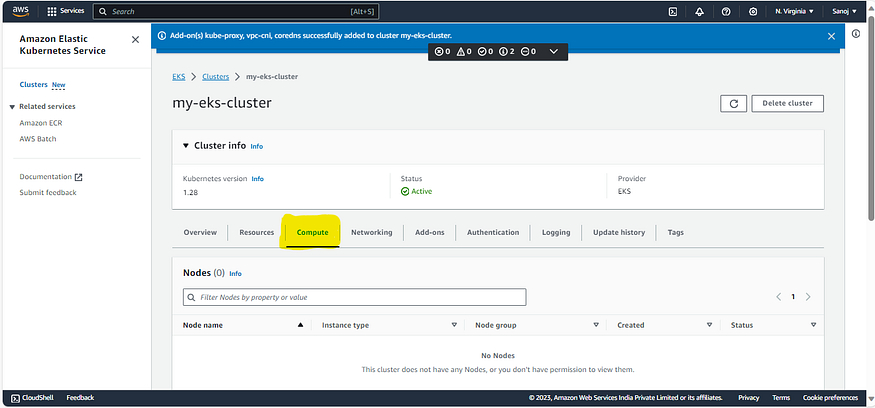
Now, scroll down and select the ‘Add Node Group’ option.”
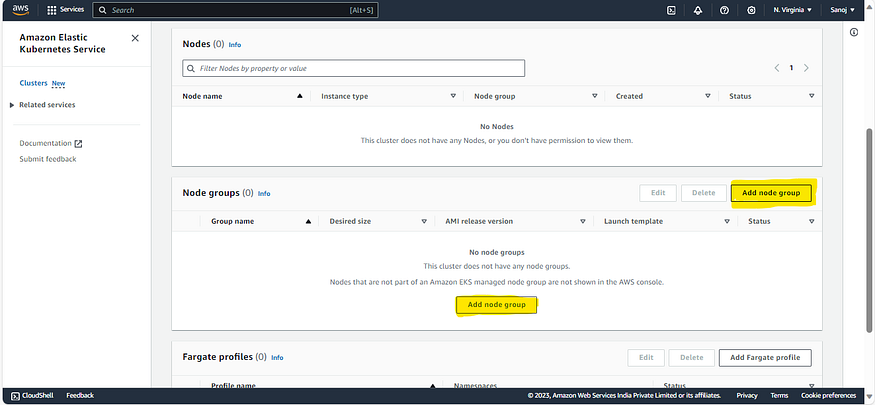
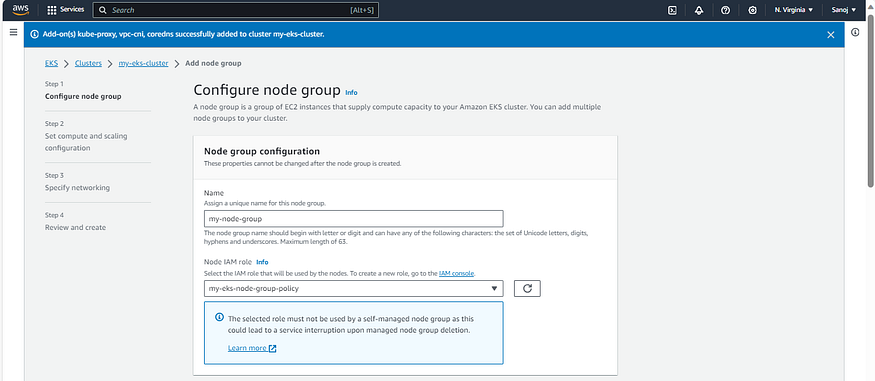
After selecting the ‘Node Group’ the following screen will appear. Here, you should provide a name for the node group and specify the Node IAM policy.
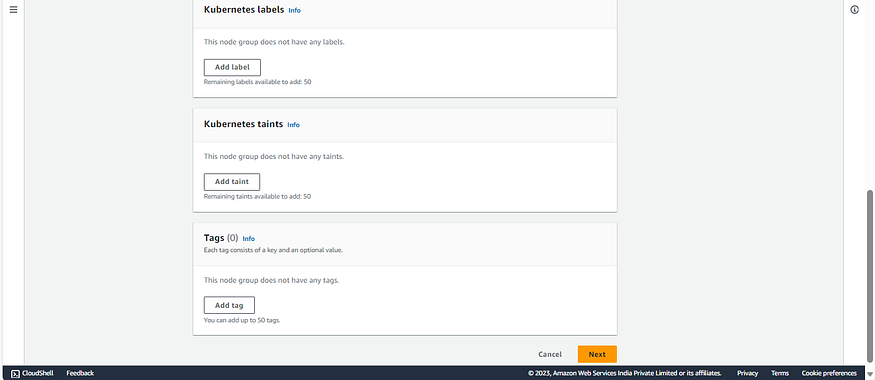
I’ve already provided the name as ‘my-node-group’ and the IAM policy as ‘my-eks-node-group-policy’ After completing this step, simply click on the ‘Next’ button
Now, you might be wondering🤔 where to find the Node IAM policy, which one to choose, or how to create it, right? Don’t worry; it’s quite simple😊. Just follow the steps I’ve outlined below.
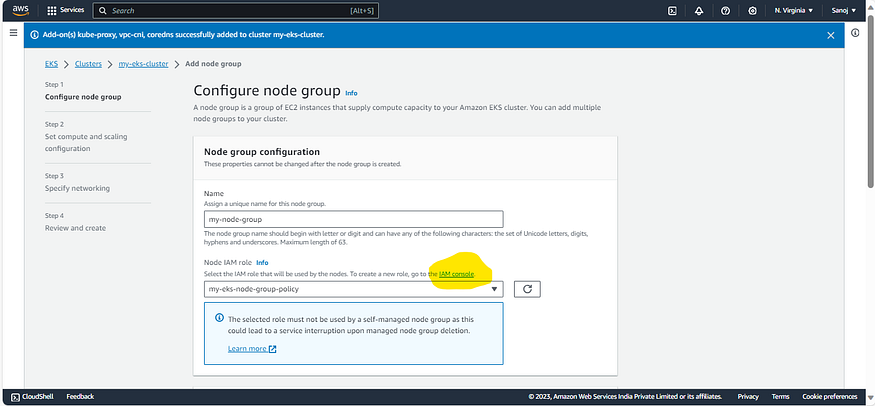
Step A: To access the IAM console, click on ‘IAM Console.’ This will take you to the IAM console’s web interface, where you can create roles and policies.
For reference, you can see the highlighted area in the snapshot below, marked in yellow
After clicking on the ‘IAM Console,’ the following screen will appear
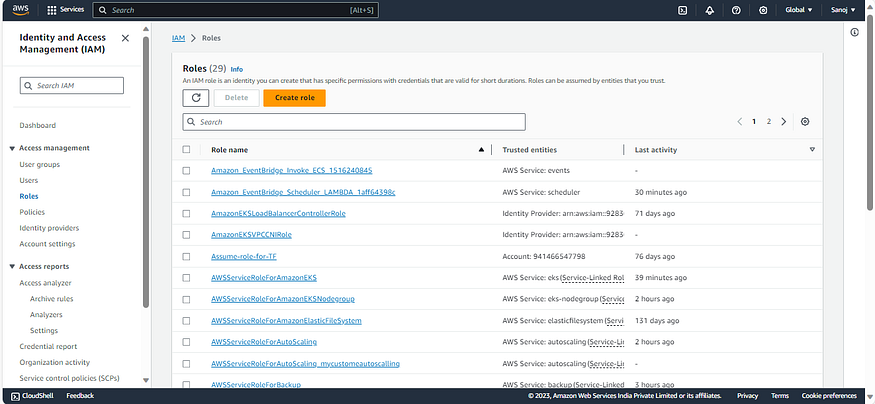
Step B: Now, click on ‘Create Role’ choose the use case as ‘EC2’ and then proceed by clicking ‘Next’ For reference, please refer to the screenshot below.
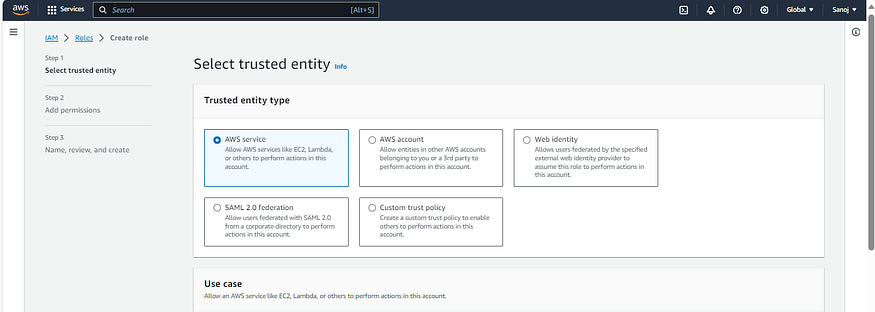
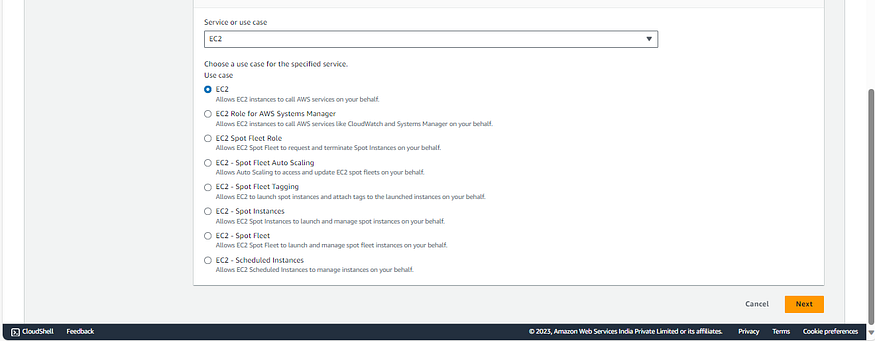
After click on “Next” following screen will appear.
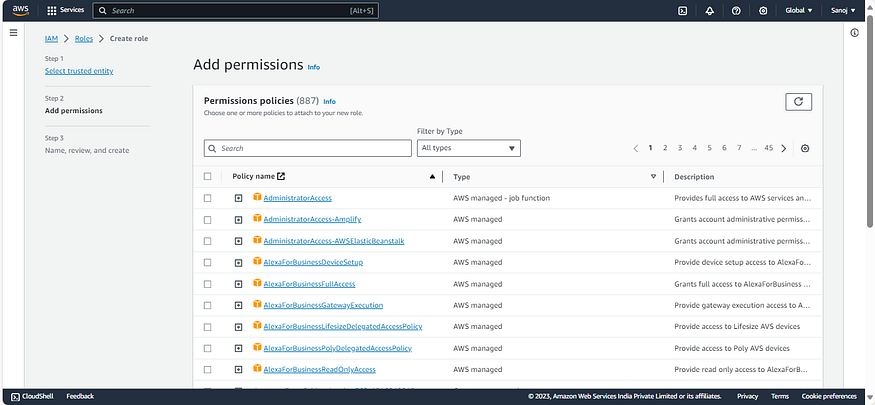
Step C: Now, in the search bar, type the specified AWS managed policy listed below and select it by clicking the checkbox. Repeat this process for each of the following AWS managed policies.
- AmazonEC2ContainerRegistryReadOnly
- AmazonEKSWorkerNodePolicy
- AmazonEKS_CNI_Policy
Here is an example illustrating how to do that. Please refer to the image below for guidance.
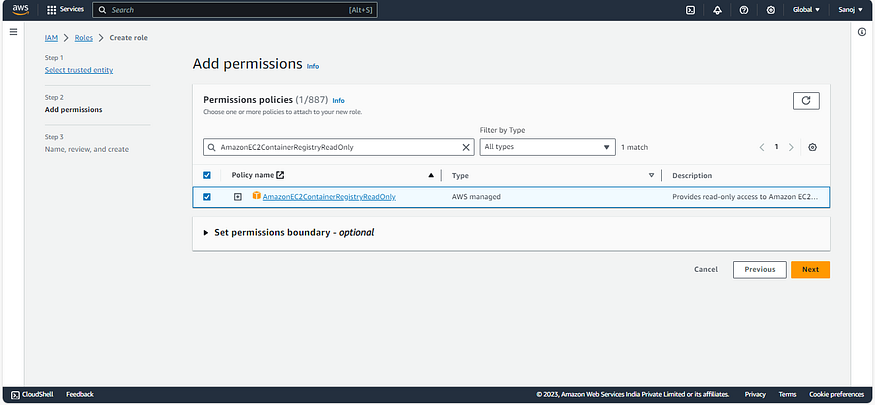
Step D : After selecting the above three policies, click ‘Next’ Provide a name for the role, and then click ‘Create Role’.
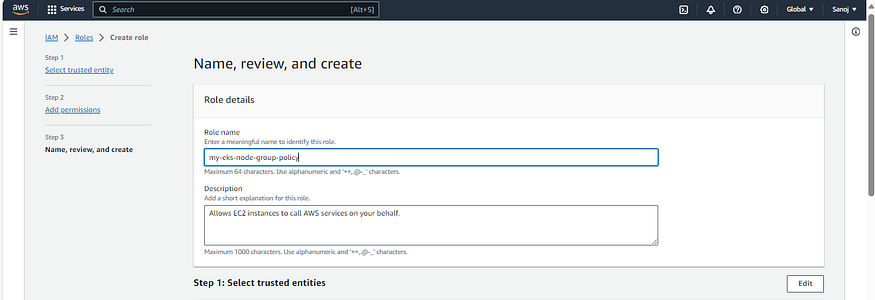
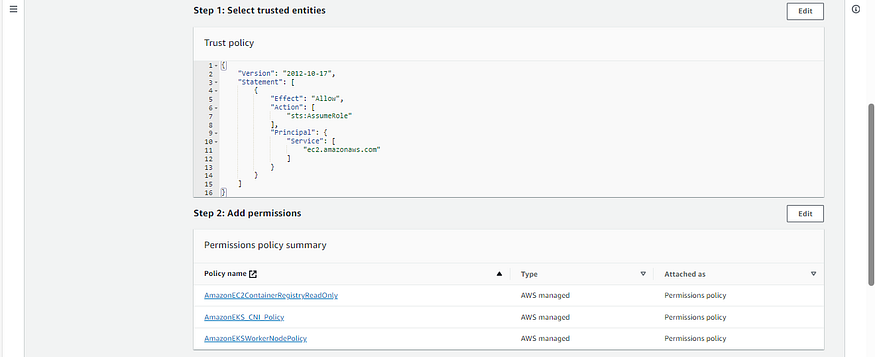
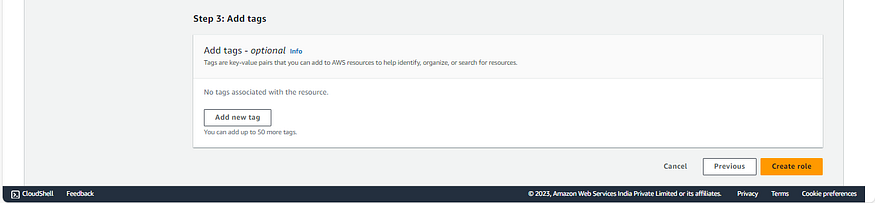
That’s it! You have successfully created your EKS node group role.
Step 10 : Now, return to your EKS console to complete the pending tasks that we left unfinished before creating the IAM role
After clicking ‘Next’ the following screen will appear, and you should choose the options according to your requirements. I’ve already made selections, as shown in the image below, for your reference.
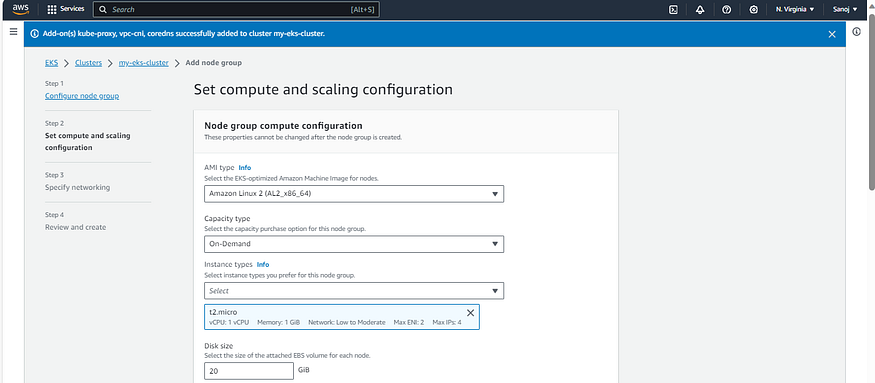
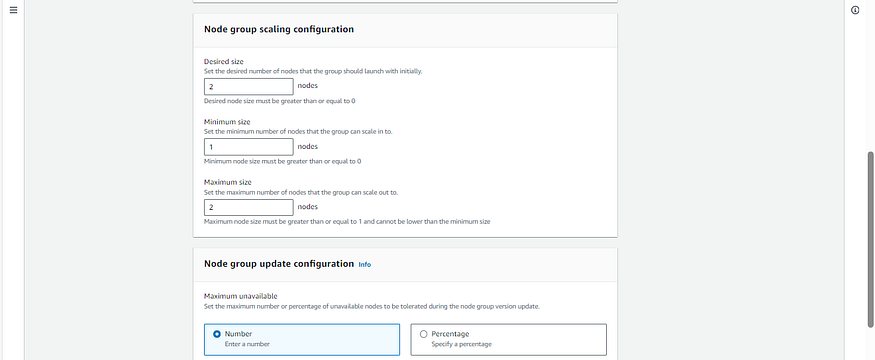

Step 11: Now click on “Next” following screen will appear.
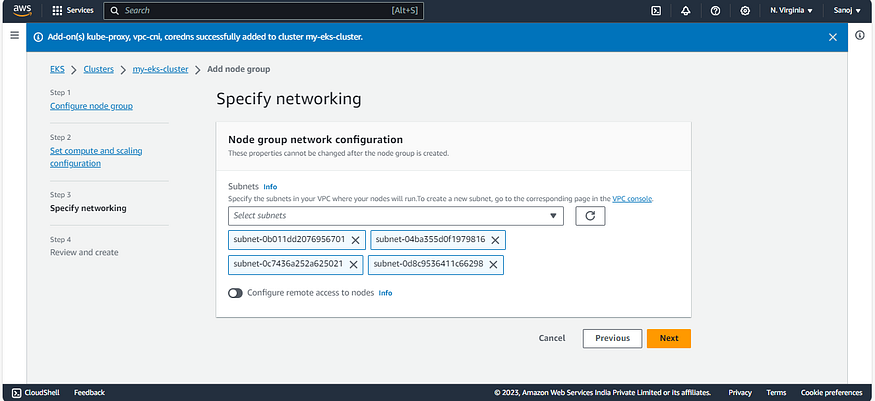
Now, click ‘Next’ It will display a review interface. If there’s anything you’d like to change, you can make adjustments.
If you’re satisfied with the settings, click the ‘Create’ button to proceed and create the node group. For reference, you can view a snapshot of the review screen below
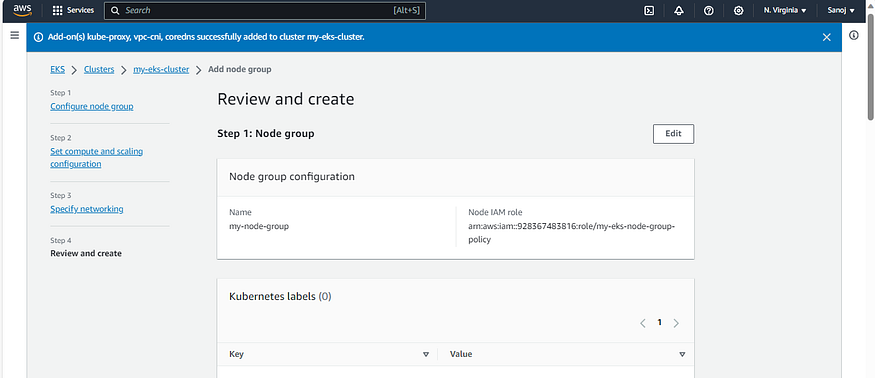
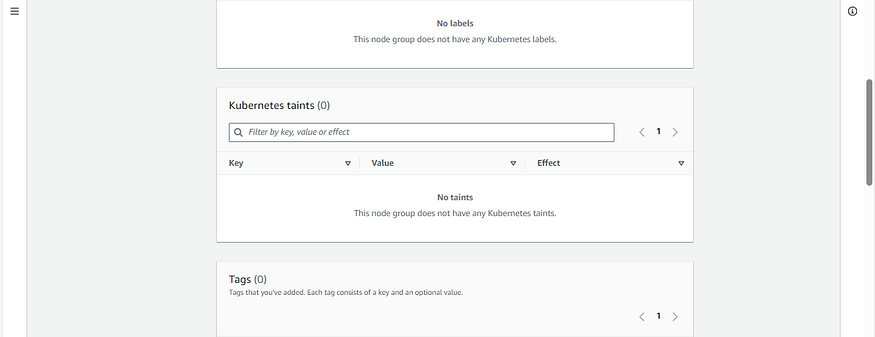
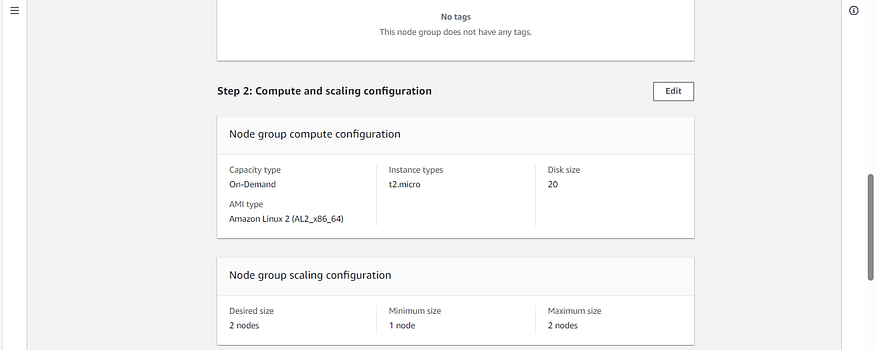
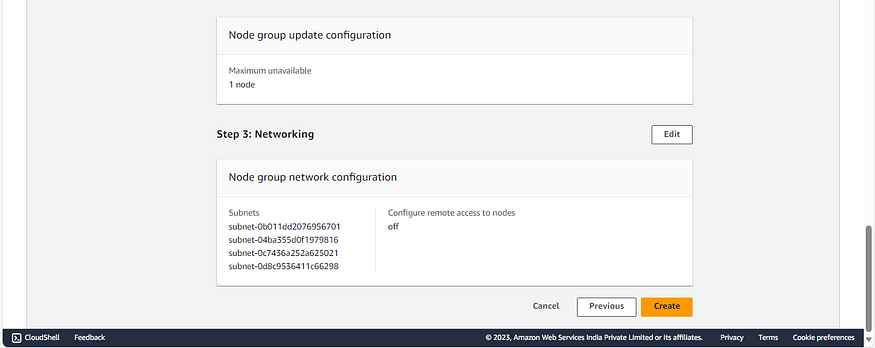
Simply click ‘Create,’ and you’re all set. The node group will take a few minutes to become operational. Once it’s up and running, you’re ready to use it.
You’ve successfully created the cluster and node group. Now, if you’re wondering how to access your EKS cluster, don’t worry; it’s quite straightforward😊.
Steps:
- Open Your Terminal: If you’re using macOS or Linux, open your terminal. If you’re a Windows user, open your command prompt (CMD).
- Install Necessary Tools: Install the necessary tools such as AWS CLI and kubectl.
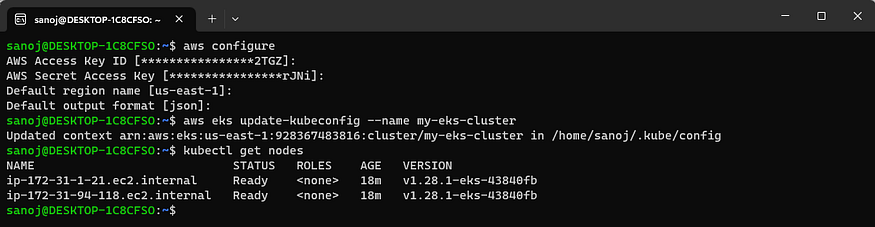
- Configure AWS: Configure your AWS credentials.
- After Configuring AWS Credentials: Once you’ve configured your AWS credentials, proceed with the following command.
aws eks update-kubeconfig --name <my-eks-cluster-name>For reference, provided below are screenshots of the AWS configure process along with the commands on how to access the EKS cluster
“Well, folks, you’ve officially mastered the art of creating an AWS EKS cluster! 🎉 Time to sit back, relax, and watch your clusters grow like virtual houseplants. 🌱 Remember, technology is an adventure, and you’re the fearless explorer.
Stay geeky, stay cloudy! 🤓☁️ And remember, keep smiling! 😄
Thank you for reading! 🙏✨”