KB 233001 - How to Setup Link Aggregation on Asustor NAS
What is Link Aggregation?
Configuring the NAS (Setting up link aggregation)
Link aggregation (also known as trunking, bonding, or teaming) is the process of combining two or more network connections into one. Link aggregation requires that your Ethernet cables be connected to the same network switch and that your network switch support link aggregation.
Link aggregation provides two primary advantages:
- Load Balancing - To boost reliability through redundancy, your network traffic loads will be shared across two connections that seem as a single connection.
- Fault Tolerance - Fault tolerance is provided by combining two network connections. If one of your network connections fails, traffic will be automatically routed to the other
ASUSTOR supports these types of link aggregation modes
Round-Robin: Transmits packets from the first available connection to the next in a consecutive order. This mode offers load balancing as well as fault tolerance.
Active Backup: There is only one active connection in Active Backup. If, and only if, the existing connection fails, a different connection becomes active. To prevent confusing the switch, the aggregated MAC address is externally exposed on just one port (network adapter). There is failure tolerance in this mode.
XOR: Transmits using the simple transmit hash policy by default. This mode offers load balancing as well as fault tolerance. Static Link Aggregation is supported in this mode.
Broadcast: Everything is sent across all connections. This mode allows for fault tolerance.
802.3ad: Creates aggregation groups with same speed and duplex configurations. employs every connection in the active aggregator in line with the 802.3ad requirements. A switch with IEEE 802.3ad dynamic link aggregation functionality is required. This mode offers load balancing and fault tolerance.
Adaptive Transmit Load Balancing: There is no need for any further switch support. Outgoing traffic is shared on each connection based on the current load. The present connection receives incoming traffic. If the receiving connection fails, another connection takes over the failed receiving connection's MAC address. This option allows for fault tolerance.
Adaptive Load Balancing: Includes both transmit and receive load balancing for IPV4 traffic and requires no specific switch support. ARP negotiation is used to balance the receive load. This mode offers fault tolerance as well as load balancing.
Configuring the NAS (Setting up link aggregation)
Step 1:
Login to user NAS
Step 2:
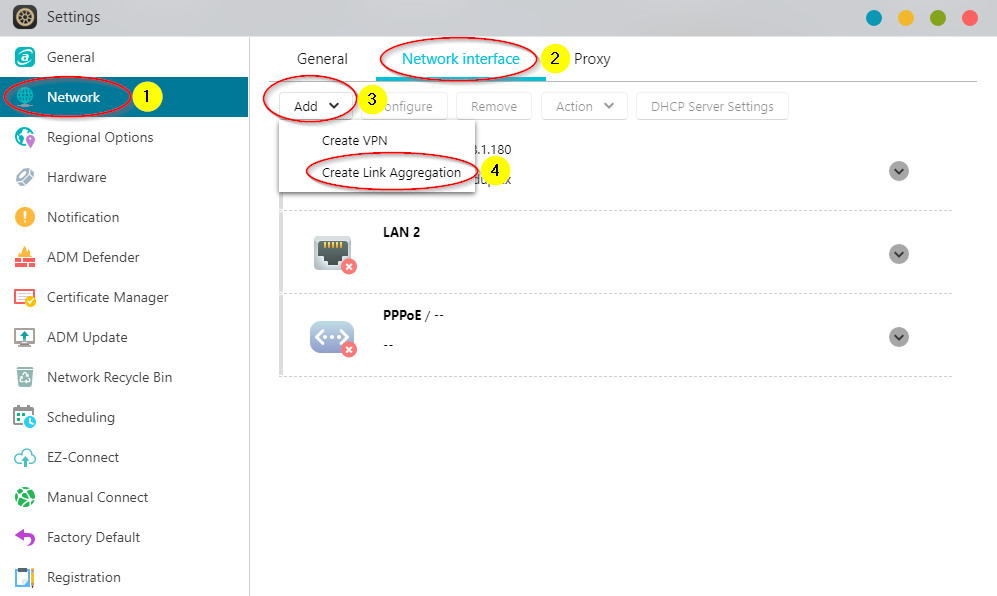
Go to Settings > Network > Network> Network Interface > Add> Create Link Aggregation.
Step 3:
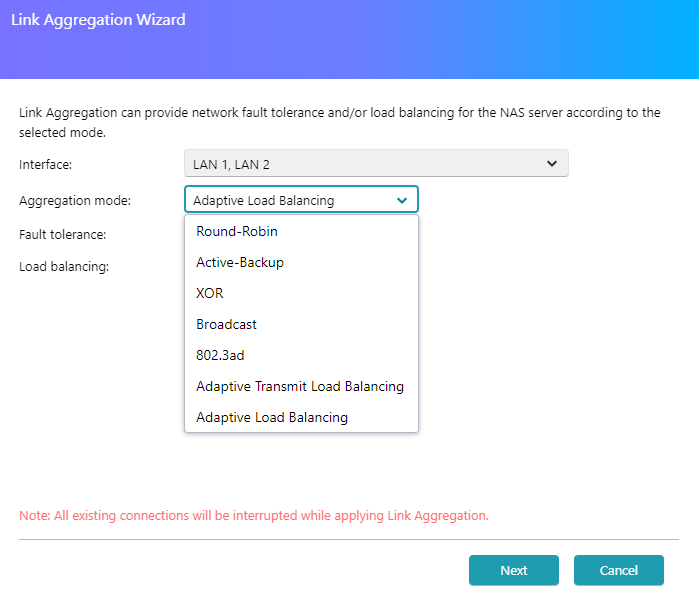
The window for the Link Aggregation Wizard will now appear. From the drop-down menu, choose an aggregation mode.
Step 4:
When you select an aggregation mode from the drop-down menu, you will be able to see the mode's fault tolerance and/or load balancing benefits. In the following example, we've chosen the "Adaptive Load Balancing" mode, which offers fault tolerance and load balancing features. After you've decided on an aggregation mode, click Next.
Step 5:
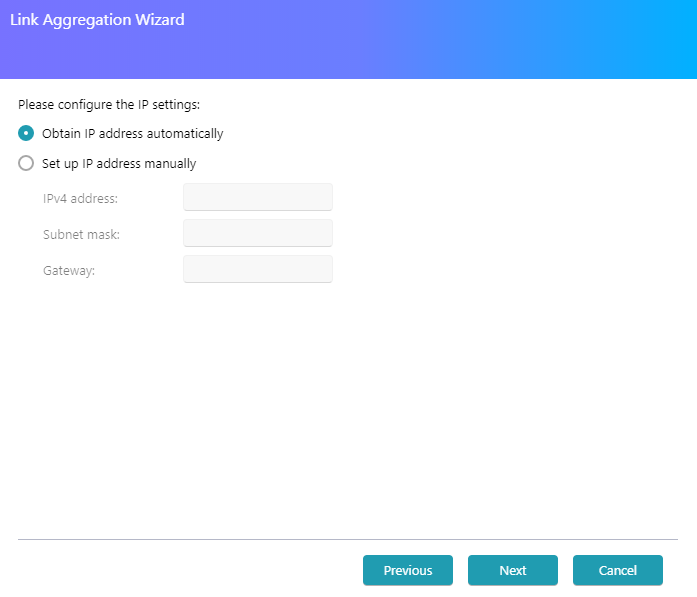
Select the Obtain IP address automatically radio button and click Next. If you want to choose your IP address manually, make the appropriate choice.
Step 6:
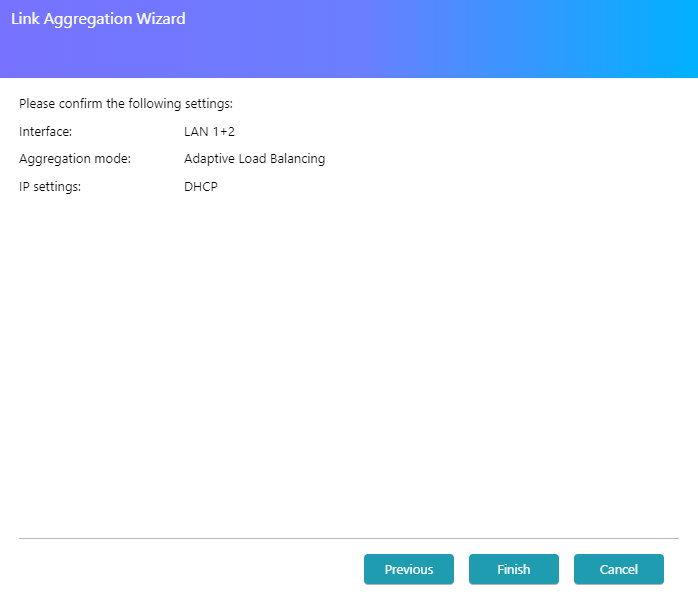
Apply to Finish confirm the settings.
Step 7:
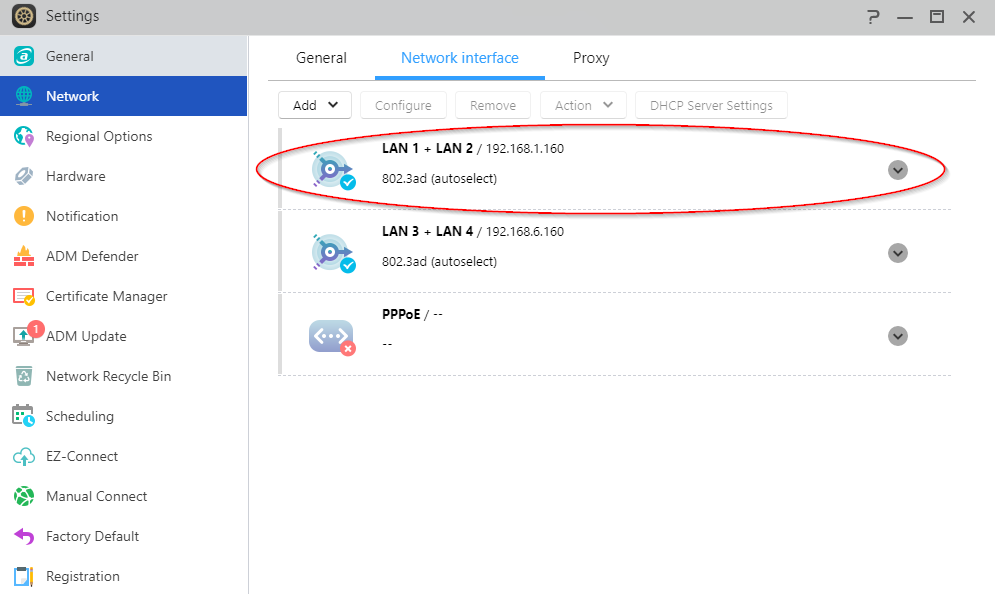
The created connection can be seen.
Step 8:
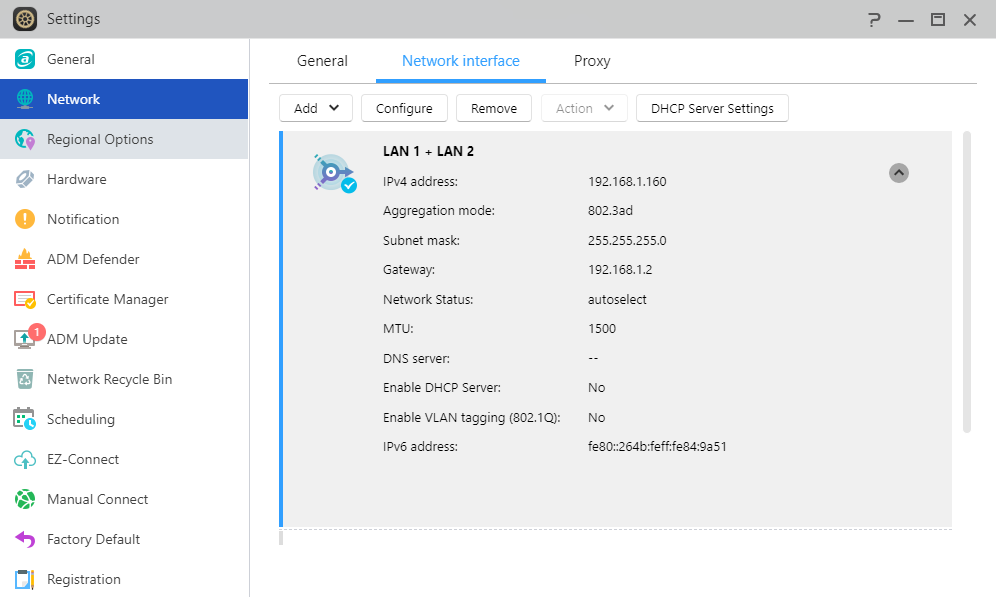
To view the detailed details, select the downward pointing.