ASUS RS500A-E12 DIMM Error
ASUS RS500A-E12 DIMM Error
Some servers have reported Dimm slot Error, which a server assembly expert may conveniently resolve using specific troubleshooting procedures.
Steps to Follow
- Turn on the machine, Check the BIOS settings, and then reset to the default settings and restart.
- Access the IPMI and verify the BIOS and IPMI versions. If there are any recent versions available, flash the firmware and BIOS onto the recent versions.
- The majority of issues are able to handled by updating the BIOS and firmware, although some hardware-related troubleshooting may be required.
Hardware Troubleshooting Procedures
Unpack the Server and place it on a clean, shock-resistant surface.
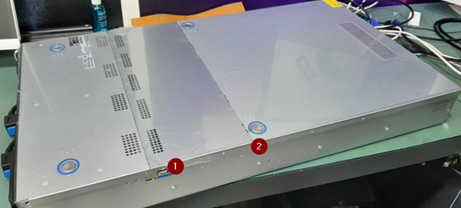
Loosen the screws and remove the top cover by sliding .
Once you have access to the Server Components, check to see if the Memories are properly installed. If not, remove and reinstall the Memories.
Removing a Memory
Installing a Memory
After populating the Memories, restart the system and check the Bios and BMC Utilities to ensure the system is recognizing the Memories.
If the memories remain unrecognized, the CPU will be a cause for concern.
Remove all of the memory from the Slots, and then carefully remove the CPU Cooler by loosening the screws
Once you have gained access to the CPU socket, unscrew the screws and carefully remove the CPU from the rail Kit. To prevent damage to the CPU socket pins, place a CPU cap on the CPU socket before removing the CPU.
After removing the CPU, remove the socket cap and inspect the CPU socket for damage. If any CPU Pin damage is discovered, immediately report it to the vendor or the dealer for the motherboard replacement, or if you are able to clear the Pin damage, do so with the vendor's approval.
If no CPU damage is discovered, gently reinstall the CPU after cleaning the CPU surface.
Reinstall the CPU heat sink and memories, then close the top cover and secure it with screws.
Once the hardware re-alien task is complete, turn on the system and verify that the CPUs and memories are correctly identified by the system through IPMI or BIOS.
If the problem has not been fixed, contact the vendor or dealer for assistance.
Related Articles
Asus GPU Server ESC8000A-E12 Failing to Power On
Asus GPU Servers Failing to Power On During the assembly process, several Asus GPU servers failed to power on. The issue was identified during initial hardware setup and pre-deployment verification. Further investigation is required to determine ...AMD EPYC 9554 (100-000000912) Incompatibility with Turin BIOS on ASUS ESC8000A-E13P
Summary This article outlines the incompatibility between the AMD EPYC 9554 processor (part number 100-000000912) and BIOS versions optimized for AMD’s EPYC 9005 “Turin” series, specifically on the ASUS ESC8000A-E13P server platform. Issue ...Checklist of information to send to ASUS as part of escalation.
Detailed description of the issue with images Contact the Asus support team and clearly describe the issue, along with any illustrative materials. There was a problem with the ASUS ESC4000A-E12 High-Density 2U GPU Server. Two servers that were stuck ...FAQ - E-Commerce Ticket Handling
General Questions to handle E-Commerce customer. Q1. How many E-commerce partner MBUZZ have? Ans. 3 Amazon Noon Microless Q2. Selling name for E-Commerce site? UAE - Galaxy International Dubai KSA - Game Changers KSA Q3. How to Identify from which ...Ubuntu Server 22.04 Installation Hangs on ASUS WRX80e-SAGE Series
During the installation of Ubuntu Server 22.04 on ASUS WRX80E-SAGE series motherboards, the installation process hangs during the boot phase. The issue is associated with USB disk recognition errors, particularly with devices managed by the XHCI ...
Recent Articles
Troubleshooting NVSM Alert NV-CPU-XX – Unrecoverable CPU Internal Error
Purpose This document provides a general troubleshooting procedure for the NVIDIA System Management (NVSM) alert NV-CPU-XX, which indicates that a CPU has reported an internal error. The article outlines how to verify whether the alert represents an ...PCIe Gen5 Switch Board Replacement
1. Objective The objective of this Method of Procedure (MOP) is to safely replace the defective PCIe Gen5 Switch Board in the Supermicro server while minimizing system downtime and ensuring all PCIe devices, including GPUs, NICs, NVMe drives, and ...Local Boot Support for DGX H200 with BCM 11
Overview This Knowledge Base (KB) article explains the supported method for deploying and managing a DGX H200 system using Bright Cluster Manager (BCM) 11 while booting the operating system from the node's local NVMe storage. To be managed by BCM, ...Execution of NVIDIA Field Diagnostic (FD) Tool and Collection of Diagnostic Logs, and troubleshooting of GPU(s) not detected
1. Objective To provide a standardized procedure for executing the NVIDIA Field Diagnostic (FD) tool, verifying GPU status, collecting the required diagnostic logs, and documenting the findings for further analysis. 2. Scope This procedure applies to ...Fiber Optic Bend Radius Measurement and Compliance
1. Purpose This article outlines the procedure for verifying that installed fiber optic cables comply with minimum bend radius requirements. Proper verification prevents signal degradation, ensures optimal optical performance, and protects the ...
Popular Articles
CP Plus Camera and NVR Configuration
NVR Configuration The CP Plus Pro Series of NVRs have been meticulously designed for providing you with upgraded performance and higher recording quality in your IP video surveillance solution. The robust processor that has been inculcated in this ...Kerberos Authentication – Overview
What is Kerberos? Kerberos is a secure authentication method used in our Active Directory (AD) environment (mbuzztech.com). It allows users to: Access multiple systems without re-entering passwords (Single Sign-On – SSO) Log in once Where We Use It ...How to Remove and Reinstall NVIDIA Drivers on Ubuntu
This article provides step by step guide to completely remove existing NVIDIA drivers and reinstall specific version of the NVIDIA driver on the Ubuntu system Prerequisites Administrative (sudo) access to the Ubuntu system. Internet access to ...Personal Computers and Servers - Classification and Point of Contact
We can classify the computers that MBUZZ handles based on their form-factor as below: Tower Workstations, Desktops, Gaming PCs and SFF (Small form factor) PCs fall under this category. These are computers people would use on a desk and rarely move. ...M.2 SSD Tier List
The sequential read and write speeds, which are usually the most advertised number, are not a proper benchmark of real-world performance or the quality of an SSD. This article categorizes and tiers SSDs based on factors like the type of NAND flash, ...